
The Ultimate Chocolate Layer Cake with Buttercream Frosting (That Kids Can't Resist Stealing)
This post contains affiliate links. If you click and choose to purchase, I will earn a small commission at no extra cost to you.
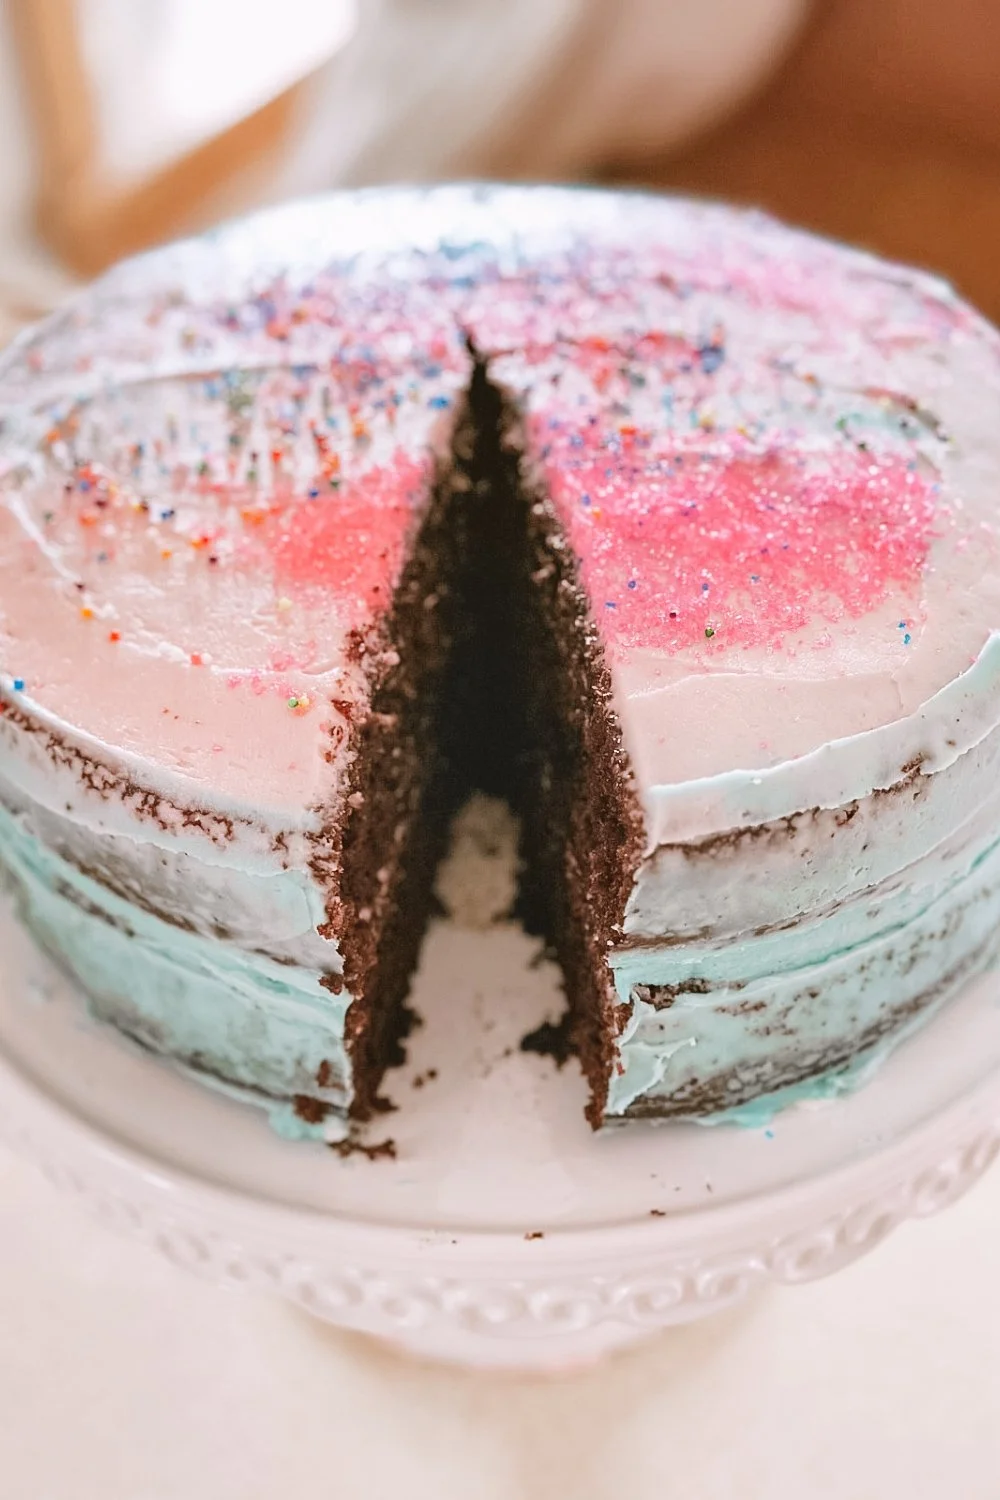
There's something magical about baking a chocolate layer cake with kids. The anticipation, the chocolate-covered faces, and yes, the inevitable frosting bowl battles. This recipe has become our family's go-to celebration cake, mostly because it's delicious, but also because there are enough "kid jobs" to keep everyone involved and (relatively) out of trouble. We ran out of frosting, but it still looked pretty as a semi-naked cake! Fair warning: you will lose at least three spoonfuls of frosting to tiny taste-testers before this cake is assembled. I've made peace with it.
The Great Sprinkle Debate
Let me tell you about sprinkles. In our house, sprinkle distribution is a SERIOUS matter. Too many sprinkles? Catastrophe. Wrong color sprinkles? Meltdown. Someone else getting to pour the sprinkles? Even bigger meltdown. I've learned to buy three containers and let each kid have their own section of the cake.
Pro Tips - Watch Out for the Frosting Thieves!
Here's what I wish someone had told me the first time I made this cake with kids: DOUBLE THE FROSTING RECIPE.
Why? Because approximately 30% will be "taste-tested," another 10% will end up on faces and fingers, and you'll still want enough to actually frost a two-layer cake generously. Trust me on this. I learned the hard way when my beautifully baked layers sat there with a sad, thin smear of frosting because the bowl had been scraped clean by enthusiastic "helpers."
Also, hide the frosting bowl between layers. Just take it and walk away. Come back when you're ready to frost. Your future self will thank you.
Speaking of frosting, investing in a good offset spatula completely transformed my cake decorating. It makes smoothing frosting so much easier, and honestly, it makes you look like you know what you're doing even when you're winging it.
Chocolate Layer Cake with Buttercream Frosting
Prep Time: 20 minutes
Bake Time: 30-35 minutes
Cooling Time: 1 hour
Total Time: About 2 hours
Serves: 12 slices
Ingredients
For the Cake:
1¾ cups all-purpose flour
2 cups granulated sugar
¾ cup unsweetened cocoa powder
2 teaspoons baking soda
1 teaspoon baking powder
1 teaspoon salt
2 large eggs
1 cup buttermilk (or milk with 1 tablespoon vinegar)
1 cup hot water
½ cup vegetable oil
2 teaspoons vanilla extract
For the Buttercream Frosting (Make a double batch—seriously!):
1 cup (2 sticks) unsalted butter, softened
4 cups powdered sugar
⅓ cup heavy cream (plus more if needed)
2 teaspoons vanilla extract
¼ teaspoon salt
Sprinkles (lots of them, for diplomatic reasons)
Instructions
Make the Cake:
Preheat your oven to 350°F. Grease and flour two 9-inch round cake pans, or line with parchment paper rounds—these pre-cut circles are a game-changer and save so much time!
In a large mixing bowl, whisk together flour, sugar, cocoa powder, baking soda, baking powder, and salt.
Add eggs, buttermilk, hot water, oil, and vanilla to the flour mixture. Beat on medium speed for about 2 minutes. The batter will be thin—this is normal! (I use this stand mixer for all my baking—it's powerful enough to handle thick frosting and has lasted me years.). Also love the glass bowl to go with it, my husband got me for Christmas.
Pour batter evenly into prepared pans.
Bake for 30-35 minutes, or until a toothpick inserted in the center comes out clean.
Cool in pans for 10 minutes, then turn out onto wire cooling racks to cool completely. DO NOT FROST WARM CAKE (I know you're tempted, but soggy, melty frosting is not the vibe).
Make the Frosting:
Beat softened butter on medium speed for 3 minutes until creamy and pale.
Add powdered sugar one cup at a time, beating on low speed after each addition.
Add heavy cream, vanilla, and salt. Beat on low speed until combined, then increase to high speed and beat for 3 minutes until light and fluffy.
If frosting is too thick, add more cream one tablespoon at a time. If too thin, add more powdered sugar.
IMPORTANT: Hide the bowl from small humans at this point. Make a second batch if you haven't already (you've been warned!).
Assemble the Cake:
Place one cake layer on your serving plate. If you have a cake turntable, now's the time to use it—it makes frosting SO much easier and the kids think it's magic. Spread a generous amount of frosting on top (assuming there's enough left after the taste-testing committee has done their work).
Place second layer on top. Frost the top and sides of the entire cake.
Negotiate sprinkle placement with all involved parties. Consider having a mediator present. We keep our sprinkles organized in these containers so everyone can have their own color.
Stand back and admire your work before the frosting thieves return. Store any leftovers in a cake carrier to keep it fresh.
Kid Jobs for This Recipe
These age-appropriate tasks keep kids involved and build their confidence:
Ages 3-5:
Measure and pour dry ingredients into bowl (with supervision)
Crack eggs into a separate bowl (expect shells, have extras ready)
Press the mixer button while you hold it steady
Sprinkle decorations on finished cake
Ages 6-8:
Measure all ingredients with these kid-friendly measuring cups
Mix dry ingredients together
Help grease and flour pans
Set the timer
Frost the middle layer
Ages 9+:
Read recipe aloud and gather ingredients
Operate the mixer independently
Check cakes for doneness
Frost entire cake
Clean up (optimistic, I know)
Tools That Make This Recipe Easier
Over the years, I've found a few essentials that make baking with kids smoother:
9-inch round cake pans (set of 2) - Non-stick and the perfect size for layer cakes
Offset spatula - Makes frosting look professional with minimal effort
Cake turntable - Kids love spinning it, and it genuinely helps with even frosting
Step stool with safety rails - So kids can reach the counter safely while mixing
Silicone spatulas - Perfect for little hands and getting every bit of batter from the bowl
Kids' apron set - Saves so many outfit changes (you can thank me later)
Disclosure: This post contains affiliate links, which means I may earn a small commission if you make a purchase through these links at no additional cost to you. I only recommend products we actually use and love in our kitchen!