
Snow Day Ice Cream Sandwiches: A Sweet (Imperfect) Surprise
A Valentine’s Day Treat
Well, we ended up having a snowy (really snowy) day today! So of course that means we are in the kitchen! These weren't in the docket for today – I was waiting until we got closer to Valentine's Day – but with the snow and cabin fever, we decided to try these out early.
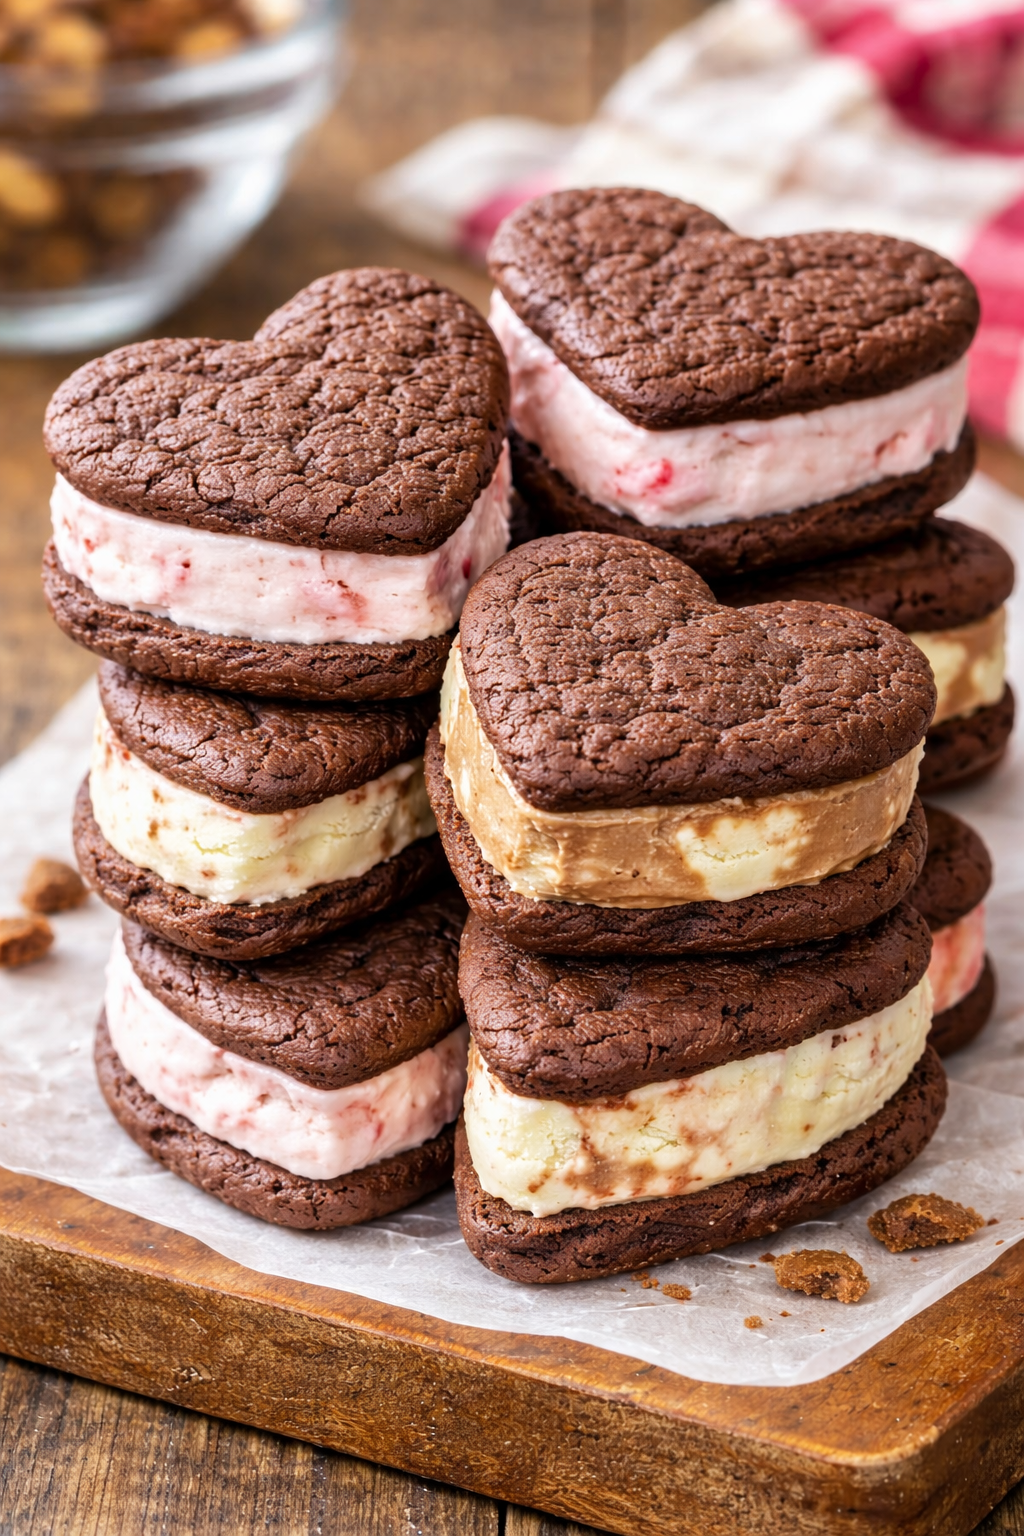
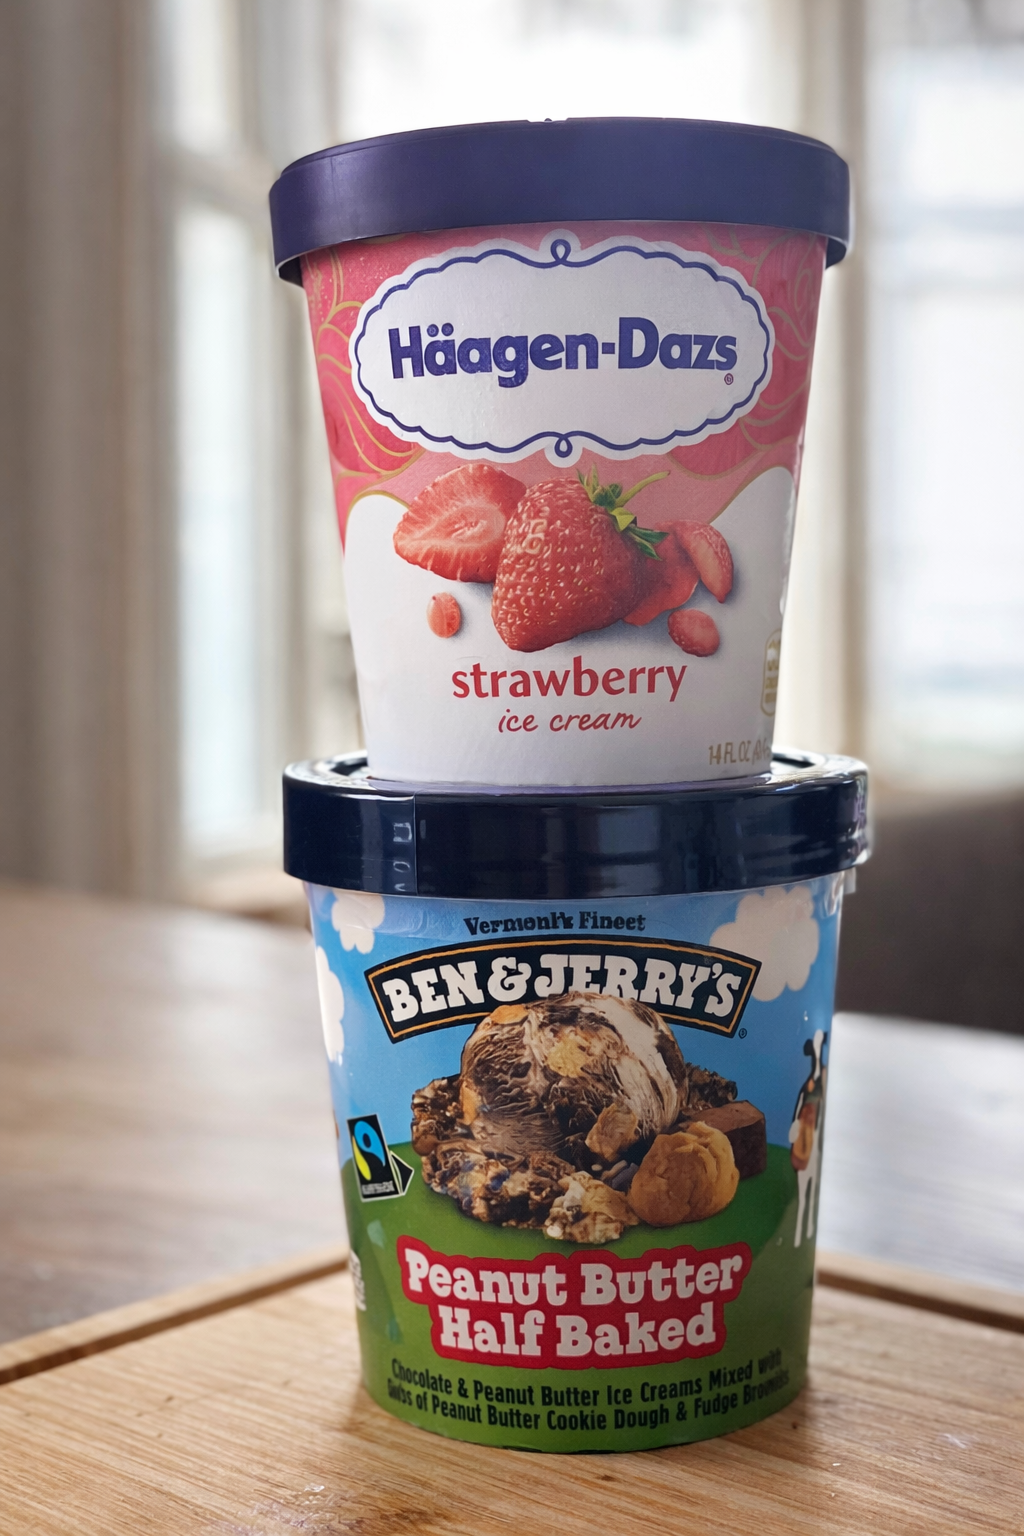
I remember my mom making these when I was younger. There's something magical about homemade ice cream sandwiches, especially when you can customize them exactly how you like. Clearly you can see that our house is divided with ice cream flavors: strawberry and peanut butter half baked. Nobody can agree on just one, so why not make both?
The Process (Or Our Version of It)
We started by bringing the ice cream out and letting it soften just a bit. Then we spread it into a square pan and put it back in the freezer to harden up properly. While that was happening, it was time for the cookies.
Chocolate, obviously. But you could also do chocolate chip if you prefer something a little less intensely chocolatey. The recipe we used (adapted from Foodal).
Time: About 2 hours (including freezing time)
Cook time: 8 - 10 minutes
Makes: 12-16 sandwiches (depending on cookie cutter size)
1 1/4 cups all-purpose flour
1 1/4 cups granulated sugar
1/2 cup unsweetened cocoa powder
1 teaspoon baking soda
1/4 teaspoon baking powder
1/2 teaspoon salt
1/2 cup plus 2 tablespoons (1 1/4 sticks) unsalted butter, softened
1 large egg
We rolled them out nice and thin. Here's a pro tip: you can use flour to prevent sticking, but I planned to use cocoa powder so it would be the same color as the dough. No white streaks, right? Well... I ran out of cocoa powder halfway through rolling, so we definitely have some white-streaked cookies in this batch. They still taste great though!

Then we cut them with cookie cutters in our preferred shapes. The fun part? Poking holes with a fork to make them look like the store-bought ones. Some of ours look more authentic than others – turns out getting evenly spaced holes is harder than it looks!
Bake at 350°F for 8-10 minutes. Let them cool completely – and I mean completely. We may have gotten impatient with a few and tried to assemble them too early. Learn from our mistakes: warm cookies plus ice cream equals a melty mess.
Assembly Time
Once the cookies were fully cooled (the second batch, at least), we used the same cookie cutter we used for the cookies to cut the ice cream into matching shapes. This ensures a perfect fit! Then it's just a matter of assembling: cookie, ice cream, cookie. Simple as that. Well, simple in theory. Some of our ice cream shapes were a bit wonky, and a couple sandwiches are definitely thicker on one side than the other.
Pop them back in the freezer to firm up, and you've got yourself homemade ice cream sandwiches that taste infinitely better than anything you'd buy at the store – even if they don't look quite as perfect.
Snow days might force you inside, but they also create the perfect opportunity for kitchen adventures. Even if Valentine's Day is still a couple weeks away, and even if things don't go exactly according to plan, these treats made our snowy day just a little bit sweeter. Plus, the imperfect ones? We ate those first. Quality control, obviously. Enjoy!
Recipe adapted from Foodal