
Elevate Your Store-Bought Cheesecake: EASY Homemade Toppings for Galentine's Night
An elegant way to present your store bought dessert, for any party! I did this for a Galentine’s Night. No one had to know about the shortcut I took!
Sometimes life gets busy, and there's absolutely no shame in taking a shortcut. When I got invited to our Galentine's night and saw everyone was bringing desserts, I knew I wanted to contribute something special, but my schedule had other plans. Enter my solution: a store-bought cheesecake dressed up with homemade toppings that made it feel completely custom.
The best part? These toppings are surprisingly easy to make, and they transform a simple cheesecake into something that looks and tastes like you spent hours in the kitchen. I made all four toppings and set up a little topping bar so everyone could customize their slice. It was a huge hit!
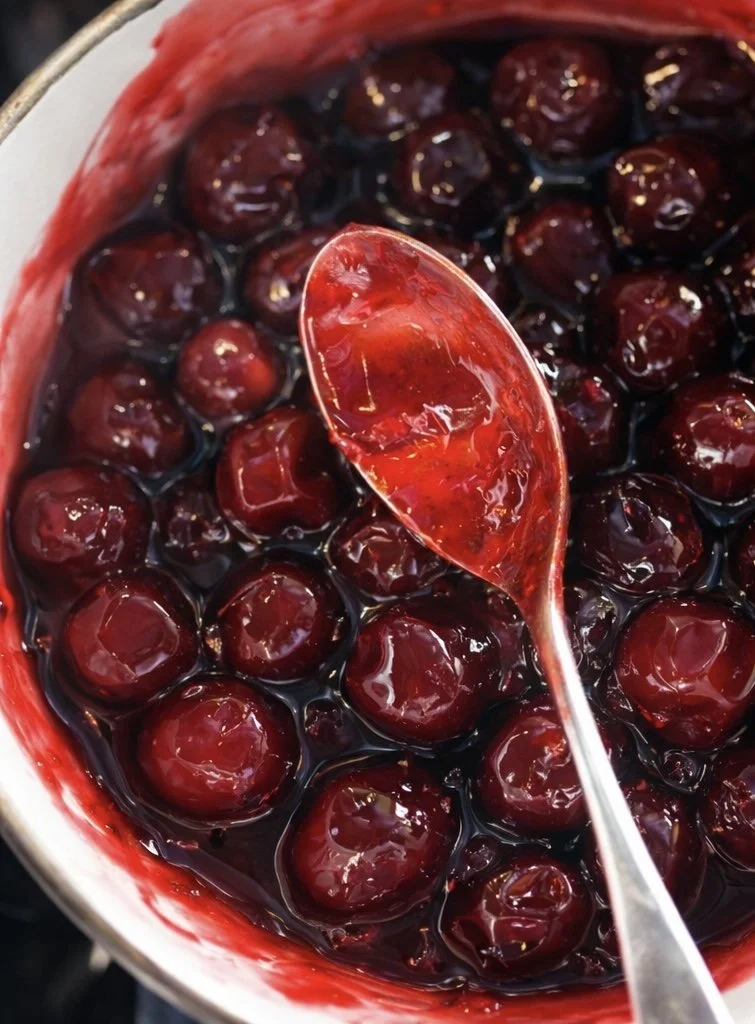
Cherry Topping
This classic topping brings a beautiful pop of color and a sweet-tart flavor that pairs perfectly with creamy cheesecake.
Ingredients:
2 cups fresh or frozen pitted cherries
¼ cup granulated sugar
2 tablespoons water
1 tablespoon lemon juice (more if you like tart)
1 tablespoon arrowroot flour (or cornstarch) with 2 tablespoons cold water
¼ teaspoon almond extract (optional)
Instructions:
In a medium saucepan, combine the cherries, sugar, water, and lemon juice over medium heat.
Bring to a simmer and cook for about 5-7 minutes, stirring occasionally, until the cherries start to break down and release their juices.
Stir the cornstarch mixture to recombine, then slowly pour it into the cherry mixture while stirring constantly.
Continue cooking for 2-3 minutes until the mixture thickens to your desired consistency.
Remove from heat and stir in the almond extract if using.
Let cool to room temperature before spooning over cheesecake. The topping will thicken more as it cools.
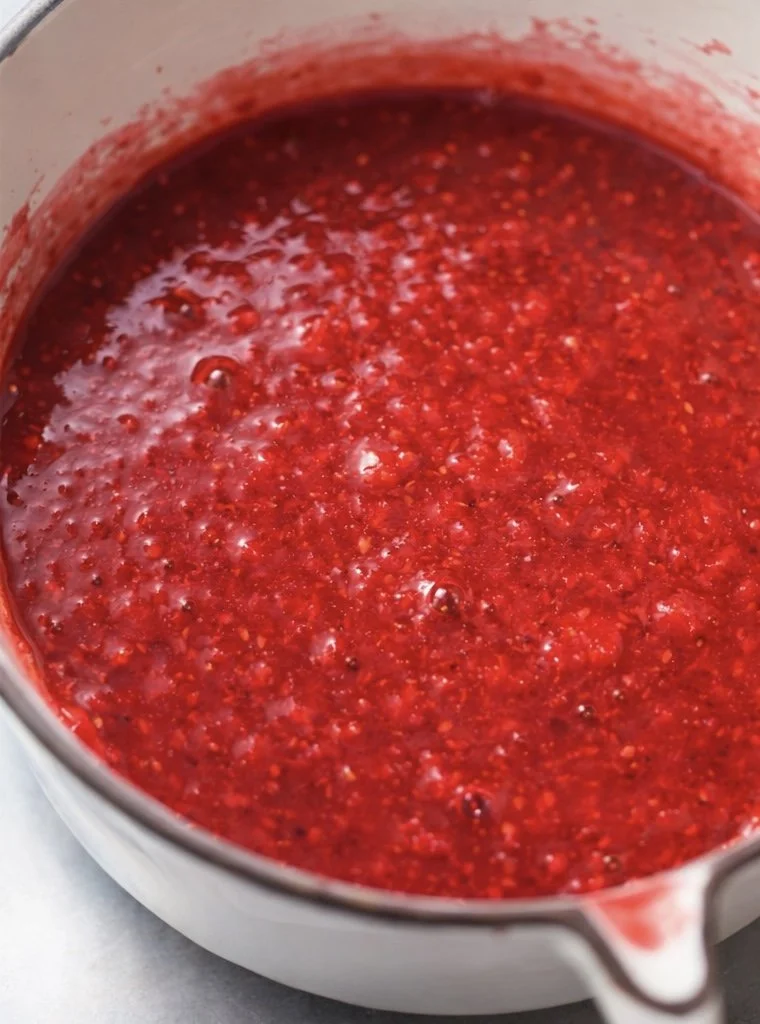
Raspberry Compote
Rich, jewel-toned, and bursting with berry flavor, this compote is elegant and delicious.
Ingredients:
2 cups fresh or frozen raspberries
¼ cup granulated sugar (adjust to taste)
1 tablespoon lemon juice
1 teaspoon arrowroot flour (or cornstarch) mixed with 1 tablespoon cold water
Instructions:
Place raspberries, sugar, and lemon juice in a medium saucepan over medium heat.
Stir gently and bring to a simmer. Cook for about 5 minutes, using the back of your spoon to lightly crush some of the berries.
Add the cornstarch mixture and stir well to combine.
Simmer for another 2-3 minutes until the compote thickens slightly.
For a smoother compote, you can strain it through a fine-mesh sieve to remove the seeds (the Food Network taught me this), no one likes a seed in their teeth.
Cool completely before serving. This will keep in the refrigerator for up to a week.
Homemade Whipped Cream
There's truly nothing like fresh whipped cream. It's lighter, fluffier, and tastes infinitely better than the canned stuff.
Ingredients:
1 cup heavy whipping cream (cold)
2 tablespoons powdered sugar
½ teaspoon vanilla extract
Instructions:
Chill your mixing bowl and whisk or beaters in the freezer for 10-15 minutes before starting. This helps the cream whip faster and hold its shape better.
Pour the cold heavy cream into the chilled bowl.
Begin beating on medium speed, gradually increasing to medium-high.
When the cream starts to thicken, add the powdered sugar and vanilla extract.
Continue whipping until soft peaks form—this means when you lift the whisk, the cream forms peaks that gently fold over.
Be careful not to over-whip, or you'll end up with butter! The whole process takes about 3-5 minutes.
Use immediately or refrigerate for up to 2 hours. Give it a quick whisk before serving if it separates slightly.
Chocolate Drizzle
The finishing touch that makes everything look professional and adds a rich, decadent flavor.
Ingredients:
½ cup semi-sweet or dark chocolate chips
3 tablespoons heavy cream
1 tablespoon butter (optional, for extra shine)
Instructions:
Place chocolate chips and heavy cream in a microwave-safe bowl.
Microwave in 20-second intervals, stirring between each interval, until the chocolate is completely melted and smooth. This usually takes 2-3 intervals.
Alternatively, you can melt the chocolate using a double boiler on the stovetop.
Stir in the butter if using, which will give the chocolate a beautiful glossy finish.
Let the chocolate cool for just a minute or two—it should be pourable but not hot.
Transfer to a small zip-top bag, snip off a tiny corner, and drizzle over your cheesecake in whatever pattern you like. Or simply use a spoon to create artistic drizzles!
The chocolate will set as it cools, creating those gorgeous dark ribbons.
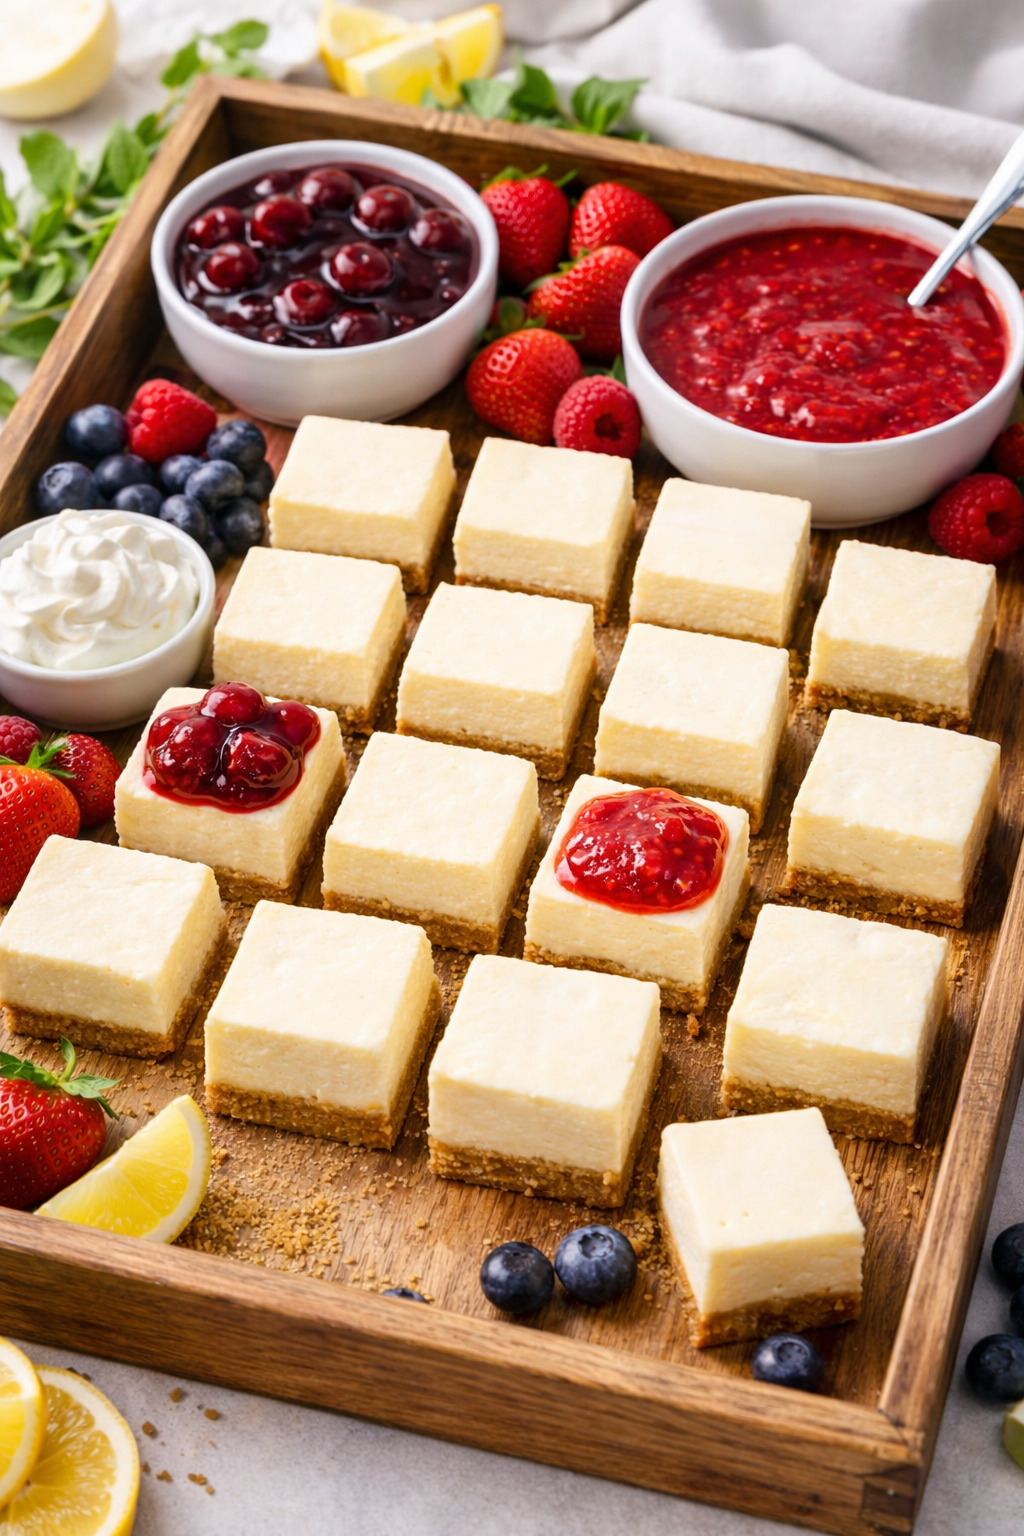
Bringing It All Together
For my Galentine's night, I arranged all the toppings in small bowls with spoons so everyone could create their perfect slice. Some people went all out with everything, while others kept it simple with just whipped cream and berries. The best part was watching everyone get creative and hearing them rave about how good everything tasted.
The secret? No one needs to know the cheesecake came from the store. Sometimes the smart shortcut is the best choice, especially when you can make it your own with toppings that taste better than anything store-bought. Plus, you'll actually have energy to enjoy the party instead of being exhausted from baking all day.
These toppings can be made a day ahead (except the whipped cream, which is best made fresh), making party prep even easier. Just store the fruit toppings in airtight containers in the fridge and give everything a gentle stir before serving.
Happy Galentine's Day (or any gathering) and here's to celebrating friendship, taking smart shortcuts, and still bringing something delicious to the table!